Have you ever closed a tab while browsing the web and then realized you didn’t mean to? Rather than having to find the site again, there is an easy way to reopen a recently closed tab. Or, have you accidentally closed a Microsoft Word, Excel, and PowerPoint file before saving? Read on for simple tricks to recover the information you need in seconds.
How to Reopen a Recently Closed Tab on the Web
On Google Chrome, Firefox, Opera, or Internet Explorer or Microsoft Edge:
- Hold down Ctrl+Shift+T at the same time. (If you repeat this function, it will continue to open closed tabs in the order they were closed.)
- If you want to see all of your recent history, simply hold down CTRL+H at the same time to pull up a listing of your history.
On Safari (on a Mac):
- If you closed a tab by mistake recently, you can press Command+Z at the same time to undo.
- You can also access your prior history under the History tab at the top of your menu bar.
How to Reopen a Recently Closed Microsoft Word, Excel, or PowerPoint File
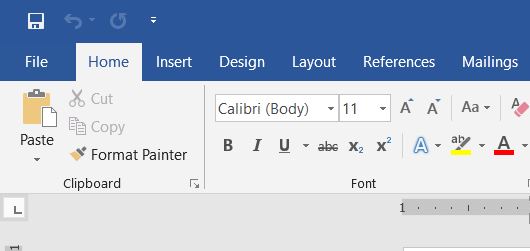
- First, open the application that you were using (i.e. Word, Excel, or PowerPoint).
- Click on File.
- Select Recent.
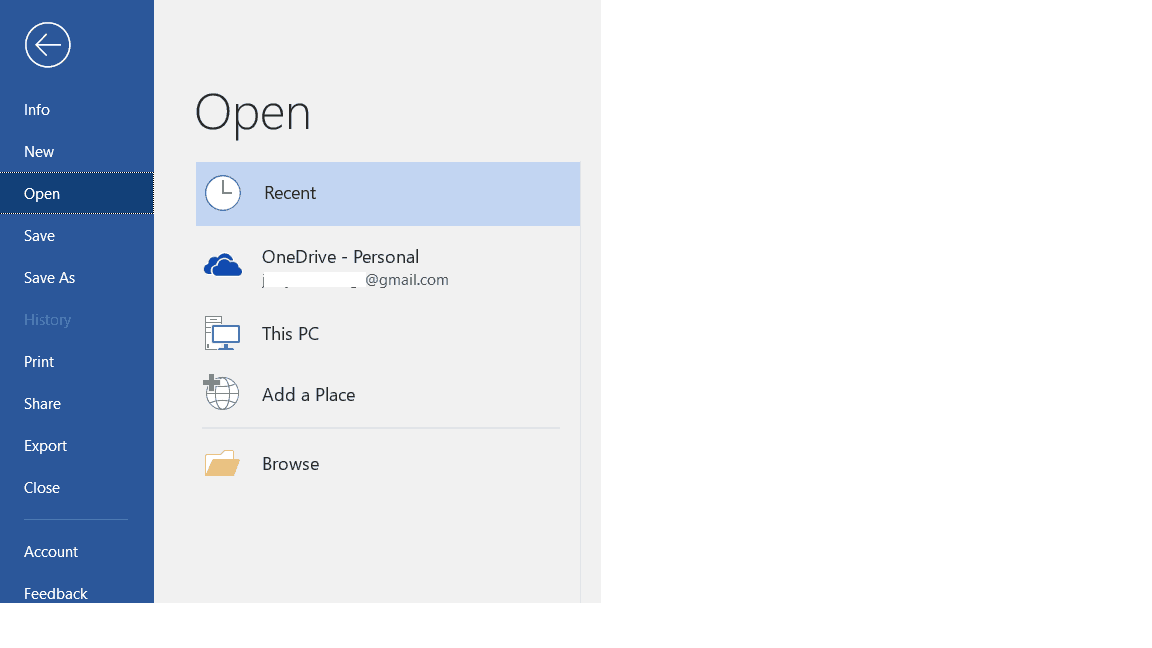
- Click Recover Unsaved Documents, Recover Unsaved Workbooks, or Recover Unsaved Presentations (depending on which application you are in).

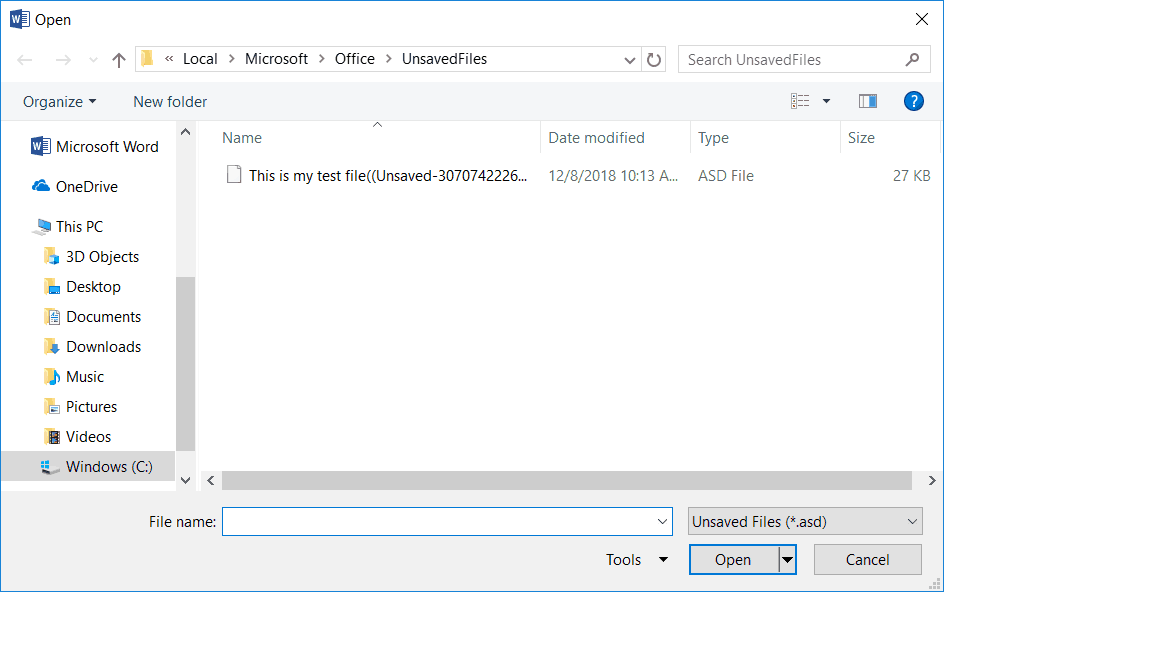
- A new window will open with your unsaved files. Select open, and don’t forget to hit Save As so you don’t lose the file again!
Caveat: You need to have your settings set up in a way to auto save. There are two buttons in your settings that you must have turned on. Read below for directions to set up your auto save.
Directions to Set Up Auto Save
- Within the application (i.e. Word, Excel, or PowerPoint), select File, then Options. In the window that pops up, select Save from the sidebar. Make sure the following buttons are selected:
- Save AutoRecover information every “x” minutes (I have mine set to 10 minutes)
- Keep the last autosaved version if I close without saving

Other Technology Tips:
How to Do a Reverse Image Search from your Computer or Phone
How to Narrow Your Email Search – Tips to Find Emails When Basic Search Isn’t Enough
Google Search Tips to Make Your Life Easier
Receive Weekly Life Hacks and Practical Advice
If you want to be notified of future posts, be sure to sign up for our email notification list! You will receive a weekly email with the latest posts added to Jac of All Things, as well as a weekly “Did you know” tidbit of information or life hack to make your life easier. Simply provide your email address below. By using this form, you agree with this site’s privacy policy.
13 Comments
Submit a Comment
Receive Weekly Life Hacks
Subscribe to receive exclusive life hacks and practical information sent directly to your inbox! By using this form you agree with this site's privacy policy.

Find out the numbers of dating App your spouse is using for hook ups and cheating in your Marriage or relationship, by cloning your spouse’s gadgets and Monitor the moves. Contact kelvin.I once use their service and the result is awesome. They specialise in secret scrutiny of mobile devices and Dating App account.
Email: [email protected]
Call, text or Signal/ whatsApp +1(341)465-4599. bjhgg
I have a working relationship with XAP Credit Solution and am also one of his success stories. He’s quick to respond with questions and knows his stuff. Let me start by stating that I have been a mortgage broker for nearly 15 years; so you can only imagine how many credit reports I have reviewed in that time. Here is a fact – not everyone has had perfect credit including myself. There are always different circumstances that land people in their current situation but you always have a choice to do something about it. When it comes to credit repair; I have referred a number of clients and friends to XAP with great results. I, for one, would not send personal friends to someone unless I had 100% confidence that they would be treated well and the results were proven. After seeing how well XAP’s program worked for my customers; I decided to move forward with my own credit repair. I strongly recommend [email protected] to anyone in need of credit repair.
HOW TO HIRE A HACKER TO RECOVER STOLEN BITCOIN. CONSULT A CERTIFIED CRYPTO RECOVERY EXPERT, FASTFUND RECOVERY.
I had always thought it would be impossible to recover stolen cryptocurrency funds until I came across the Fastfund Recovery team. This cryptocurrency recovery team successfully recovered my stolen Bitcoin and Ethereum funds.
I was one of the many victims of a crypto scam, and I lost my entire family savings trying to double it.
It was a very difficult time for me and my family. I was depressed and gave up hope of ever getting my money back. A few weeks ago, I came across a post while searching for clues on Google on how to recover my cryptocurrency. I saw a recommendation about Fastfund Recovery and how they were able to recover cryptocurrency funds for many scam victims effectively. I didn’t hesitate to contact them and provide all the necessary information. Fastfund Recovery was able to recover my funds within two days. I’m truly grateful for their service, and I promised them I would recommend them to others like me.
You can easily reach them via
E-Mail: Fastfundrecovery8 (@)gmail com
W/A: 1 (807)500-7554.
Fastfund Recovery is no doubt the best when it comes to recovering cryptocurrency funds.
Hey, thanks for this guide – I actually just lost a tab I was reading about Razed Crypto Casino and your shortcut saved me from digging through my history. 😂 I’ve been really into their online games lately, especially the crash games and slots, since the whole crypto setup makes payouts so much faster and more private. It’s honestly refreshing to find a site where I don’t have to jump through a million verification hoops just to play a few rounds. Anyway, if anyone’s curious, here’s the link: Razed Crypto Casino. Appreciate you putting this post together – definitely bookmarking it for next time my clumsy fingers close the wrong tab!
HIRE WIZARD HILTON CYBER TECH FOR PROFESSIONAL CRYPTO RECOVERY SERVICES.
I never thought I would see my funds again after falling victim to a fake crypto investment platform. Everything looked legitimate at first the website, the support team, even the trading dashboard. But when I tried to withdraw my profits, I kept being asked to pay additional fees. That’s when I realized I had been scammed and had already lost over $118,000 in cryptocurrency.
After weeks of frustration and trying to figure things out on my own, I decided to contact a professional crypto recovery team WIZARD HILTON CYBER TECH. From the beginning, they were transparent about what was possible and what wasn’t. They carefully analyzed the blockchain transactions, explained the process step by step, and kept me updated during the investigation.
The process took some time, but their persistence paid off. With their help, I was able to recover my lost funds. What impressed me most was their professionalism and constant communication,they treated my case seriously and never made unrealistic promises.
If you’ve lost crypto to a scam like I did, I know how hopeless it can feel. My advice is to act quickly and seek legitimate help from WIZARD HILTON CYBER TECH. I’m incredibly grateful for the support I received and relieved that I didn’t give up. Email : wizardhiltoncybertech ( @ ) gmail (. ) com
WhatsApp number +18737715701
There are days when I just want something quick and effortless, without signing up for complicated systems or going through multiple steps. What works best for me are casinos where you can jump straight into games, often even in demo mode, and start playing within seconds. The key is minimal friction—no long loading times, no unnecessary menus. I’ve found that platforms designed for simplicity make spontaneous sessions much more enjoyable. During my search for this kind of experience, I checked https://piperspinuk.org , and in the middle of their platform descriptions I found several options that allow fast access and smooth gameplay without wasting time, which fits perfectly for short, casual play.
Hơn 1.000+ kèo cược thể thao tốt nhất thị trường sở hữu tỷ lệ thưởng cạnh tranh đang được 3 NPH Sportsbook cập nhật mỗi ngày tại 888slot trang chủ . Bạn có thể thử sức với 40+ bộ môn khác nhau như: Bóng đá, bóng rổ, bóng chuyền, khúc côn cầu, Boxing, võ tổng hợp MMA,… TONY04-01H
Slot tại 66B game tương thích với mọi hệ điều hành: iOS, Android, Windows – chơi mọi lúc, mọi nơi mà không cần tải app. TONY04-20H
Suspecting infidelity is emotionally exhausting. Doubt, anxiety, and unanswered questions can quietly consume your peace of mind. In today’s digital world, affairs are no longer limited to secret meetings—they often happen through Green App, social media, hidden emails, dating apps, and encrypted phones, that’s why more people now choose to hire a hacker to catch a cheating spouse—not an illegal hacker, but a licensed ethical hacker and private investigator who can uncover the truth legally, discreetly, and professionally.
At Allegiant Pro Hacker, we specialize in ethical hacking, digital forensics, and cybersecurity investigations designed to reveal hidden digital behavior while preserving privacy, legality, and evidence integrity. Contact Information:
Whatsapp: +1 802 245 9576
Email: [email protected]
The Digital Reality of Modern Infidelity
Cheating has changed. Today, spouses often hide affairs using:
* Secret Telegram chats
* Burner phones and secondary SIM cards
* Dating apps disguised as utility apps
* Hidden cloud accounts
* Deleted messages and locked devices
Trying to “catch” a cheater by guessing passwords or secretly accessing a phone can backfire legally and emotionally. This is where ethical hacking and digital forensics become essential.
We analyze digital footprints, recover data, and identify suspicious behavior using forensically sound methods.
Why Hire a Hacker to Catch a Cheating Partner?
Clients come to us when:
* Their spouse suddenly guards their phone
* Messages and call logs keep disappearing
* Social media behavior has changed
* Devices are locked or encrypted
* Financial activity seems hidden
* They need evidence for divorce or custody cases
If you’re searching for:
* hire a hacker to catch a cheating partner
* hire a hacker to hack a social media account
You’re not alone—and you’re not wrong to want clarity.
How Ethical Hacking Helps Uncover Infidelity
1. Digital Forensics Analysis
Our investigators examine:
* Deleted messages and metadata
* App activity and usage timelines
* Login locations and device access history
* Cloud backups and synced devices
Digital forensics often reveals patterns, even when messages are deleted.
2. Mobile & Device Investigations
We perform lawful examinations on:
* Smartphones (iPhone & Android)
* Tablets and synced devices
* Cloud-connected accounts
This distinction is critical when trying to catch a cheating spouse without ruining your case—or your future. Digital Forensics in Divorce & Custody Cases
Many clients hire us during:
* Divorce proceedings
* Child custody disputes
* Asset discovery investigations
Our digital forensic findings can support:
* Proof of hidden relationships
* Evidence of dishonesty
* Documentation of digital misconduct
Attorneys often rely on our reports for clarity, not confrontation.
Why Choose Allegiant Pro Hacker?
✔ Ethical hackers & private investigators ✔ Digital forensics specialists ✔ Confidential consultations ✔ Global service availability ✔ Legal-first investigative approach ✔ Cybersecurity & evidence expertise
We focus on truth, clarity, and protection, not drama.
Common Signs a Spouse May Be Cheating Digitally
* Phone always locked or face-down
* Sudden use of encrypted apps
* Deleted chat histories
* Unexplained online activity at night
* Secret social media accounts
* Defensive behavior around devices
If these sound familiar, it may be time to hire a hacker to catch a cheating spouse—the right way.
Reach out to Allegiant Pro Hacker with the details below
Whatsapp: +1 802 245 9576
Email: [email protected]
Accidentally losing your progress or closing an important tab can be incredibly frustrating, so having these quick recovery tricks on hand is an absolute lifesaver. Personally, I love using smart shortcuts to keep my online sessions smooth and stress-free. When I want to channel that same quick-thinking energy into pure excitement and a genuine shot at a major payout from home, I always head straight over to https://foxslotscasinode.com/de-de/ This premier online casino platform delivers a world-class gambling experience, packed with thousands of high-RTP slots, intense live tables, and rapid payouts. It is easily my top choice for a rewarding break today.
HOW HASHGUARD CYBER LAB HELPED ME RECOVER $62,000
Hello Guys,
My name is Alexandra Naro, and I am from America. I would like to share my experience after becoming a victim of an online investment scam.
last year, I invested $62,000 on what appeared to be a legitimate online investment platform. Everything looked professional at first, and I was promised high returns on my investment. Unfortunately, after depositing my money, I realized that the platform was fake. I was unable to withdraw my funds, and the customer support team stopped responding to my messages. I felt frustrated, disappointed, and hopeless.
While searching for help online, I came across HASHGUARD CYBER LAB. After reading about their services, I decided to contact them and explain my situation. Their team listened carefully, guided me through the recovery process, and kept me informed every step of the way.
I was impressed by their professionalism, dedication, and commitment to helping scam victims. They took the time to investigate my case and provided support throughout the process. Their communication was excellent, and they answered all my questions promptly.
I am grateful for the assistance and support I received from HASHGUARD CYBER LAB. My experience with them gave me hope during a very difficult time.
To anyone who has fallen victim to an online investment scam, I recommend staying calm, gathering all available evidence, and seeking professional assistance as soon as possible.
Thank you, HASHGUARD CYBER LAB, for your support and guidance.
Alexandra Naro, America 🇺🇸
COMPANY INFORMATION
🏢 HASHGUARD CYBER LAB
📧 E-MAIL BOX: [email protected]
💬 TELEGRAM: HASHGUARD CYBER LAB
Hello
Do you need hacking services or faced with delays and unnecessary excuses from fake hackers on your job? Worry no more,we are here for you,we will give you the best result without stress.We are professional hackers, what hacking services do you need? We will render it with swift response and no delay, your job is 100% guaranteed.Contact us at [email protected] for more information.Our services includes:
*School grade hack,
*hack into email accounts,
*all social media accounts,
*school database to clear or change grades,
*Retrieval of lost documents
*Erase criminal records
*Company records and systems,
*Bank accounts,
*Iphone Hack
* Credit card hacking,
*Website crashed hack
* Credit score hack,
* Recover stolen Bitcoin or crypto money
* Monitor your partners phone, etc.. Contact us now any kind of hack job.
I’m forever grateful to Jetwebhackers for their remarkable assistance in recovering the $105,540 BTC I had lost to a crypto scam. This amount was meant to cover my husband’s urgent hospital bills, and I was deceived by a fraudster posing as Agent David, who promised me a return of $380,940 but it was all a scam. Thanks to Jetwebhackers’ expertise and dedication, I was able to recover not only the initial investment but also the profit I was promised. Their help has been a blessing to my family, and we can now focus on my husband’s recovery without financial stress. I highly recommend Jetwebhackers to anyone who has fallen victim to crypto scams. They are professional, efficient, and compassionate. Thank you, Jetwebhackers, for your exceptional service and support during a difficult time!
EMAIL: [email protected]
Telegram: @jetwebhackers